

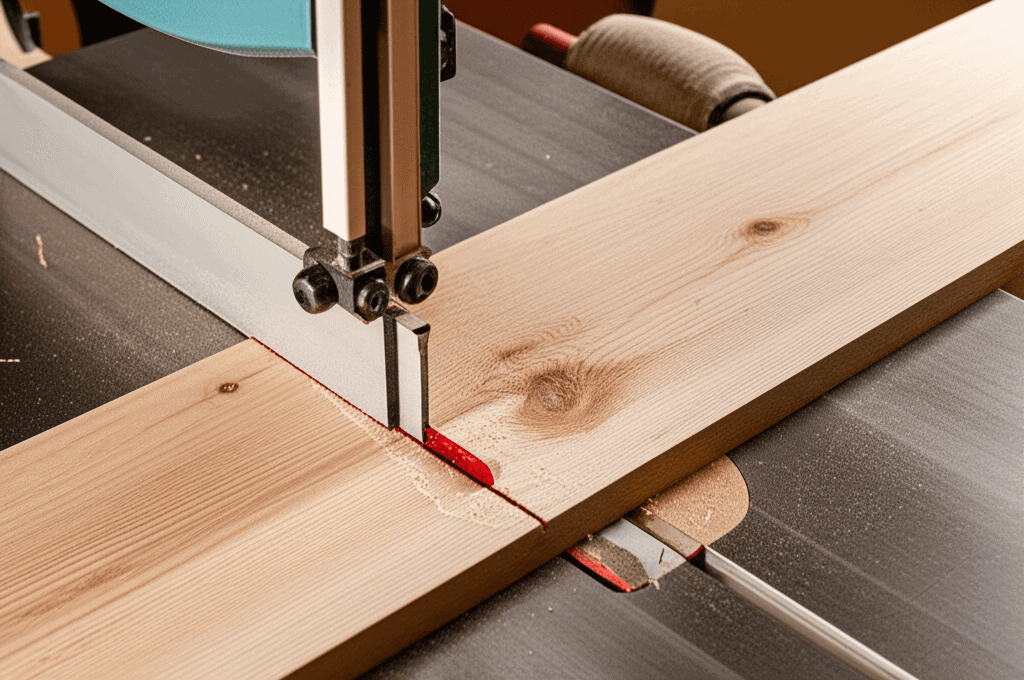
Resawing with bandsaws works on one simple idea that unlocks many opportunities for woodworkers. Whether cutting thick wood into thinner boards for a tabletop or slicing veneer for fancy designs, the bandsaw often stands out as the top tool. The trick is learning a few important techniques that keep the cuts safe and steady each time. Woodworkers who master these moves get a big advantage, turning tough cuts into smooth, repeatable tasks that save time and wood. This guide reveals the tips that set pros apart and gives you the confidence to handle any resawing job with ease. Keep reading to discover the secrets that make resawing easier and more fun.
Resawing is not just about running a piece of wood past a blade. It requires the right blade choice setup and technique. The information below is aimed at hobbyists and pros who want to cut cleaner faces reduce waste and get consistent thickness across long cuts. Expect practical examples troubleshooting tips and a checklist to follow before you turn on the motor.
What resawing means and common uses in the shop
Resawing is the process of cutting a board along its thickness to create thinner boards or sheets. Typical uses include making bookmatched boards slicing veneer producing thinner stock from expensive lumber and reducing waste when milling logs. Resawing can turn a 2 inch thick board into two or more boards that are suitable for panels or table tops.
One advantage of using a bandsaw for resawing is the smaller kerf compared with circular saws. A narrower kerf means less material lost to sawdust and a better yield from valuable wood. A bandsaw also handles large and awkward pieces more easily because of the open table and tall blade clearance.
Blade selection for resawing with bandsaws
Choosing the right blade is the most important decision for a clean resaw. Blades are defined by width tooth configuration and teeth per inch TPI. For resawing thick hardwoods a wider blade from 3 4 or 1 inch reduces blade drift and gives a straighter cut. For thinner work or curved resawing a narrower blade can be useful but for straight long resaws a wider blade is preferred.
Tooth pitch and patterns
Low tooth counts such as 3 to 6 TPI are common for resawing large sections because they remove more material with each pass and clear chips quickly. Skip tooth and hook tooth patterns tend to be more aggressive at chip removal and reduce heat buildup. For very thin veneer slices a higher TPI blade can produce a smoother surface but will slow the cut and increase the tendency to clog.
Blade material and maintenance
High speed steel and bi metal blades are common choices. Bi metal blades last longer and resist tooth breakage when cutting hardwoods. Keep blades sharp and replace when they start to wander or leave burn marks. Regular tension checks and cleaning the blade gullets from buildup will extend service life and improve cut quality.
Setting up the bandsaw for accurate resaw cuts
Setup covers blade tension blade tracking guide bearings and table alignment. Start by checking wheel alignment and tracking so the blade follows the crown on the wheel without rubbing the tires. Set blade tension according to the saw makers chart. Too little tension causes wandering and chatter while too much can overstress the blade or bearings.
Guide bearings or blocks should be set close behind the blade to prevent it from twisting during the cut. Thrust bearings behind the teeth take the backward force from the workpiece and should be adjusted so they support the blade only when it meets resistance. If they are set too tight the blade will rub and heat. If too loose the blade can flick back and break under load.
Fence techniques and jigs that lead to better resawing
A tall solid fence helps keep board faces parallel and reduces drift. A resaw fence is thicker and taller than a standard rip fence and gives more support to thin vertical cuts. For very thin veneers or when absolute evenness matters consider using a tall backer board clamped to the fence to reduce tearout.
Featherboards and push blocks improve control and reduce the chance that the workpiece will rock. For long boards use auxiliary support rollers or infeed and outfeed stands to maintain steady feed and keep the board level as it passes through the cut.
Using a sled for thin or narrow pieces
A sliding carriage or sled can be very helpful when resawing narrow pieces that are hard to hold against a vertical fence. The sled supports the workpiece and keeps hands away from the blade. Make the sled tall enough so that it rides against the same fence you use for the resaw. This gives consistent geometry from cut to cut.
Feed rate saw speed and managing tearout
Feed rate and blade speed have a big impact on the cut surface. Push the work at a steady moderate pace rather than forcing it. For thick hardwoods a slower steady feed produces an even face and reduces the chance of burning. If the feed is too fast the blade can overheat and leave scorched edges.
Blade speed or surface feet per minute SFM plays a part too. Lower blade speeds are often used for resawing dense hardwoods while higher speeds suit thin blades and softwoods. If your saw has variable speed experiment within the range recommended by your blade maker and watch for changes in finish and temperature.
Common problems and how to fix them
- Blade drift Make sure the blade width matches the task and that tension and guides are adjusted. Check table alignment and blade tracking.
- Burn marks Slow the feed speed check blade sharpness and confirm blade teeth are clearing chips instead of packing them into the gullets. Consider a blade with larger gullets for aggressive chip removal.
- Tearout Use a backer board clamp a zero clearance insert or a scoring cut near the top and finish with a plane or sanding for final cleanup.
- Blade breakage Inspect for worn guide bearings incorrect tension or excessive side pressure from improper jigs. Replace damaged blades and correct setup before resuming.
Safety practices for resawing with bandsaws
Safety cannot be an afterthought. Keep hands at least 6 inches from the blade. Use push sticks push blocks and a sled when appropriate. Turn off dust blinders and guides and never remove guards while the saw is running. Always wear eye protection and hearing protection when cutting.
Secure long stock with appropriate supports to avoid kickback or binding. If a board starts to close on the blade stop the saw and reposition clamps or supports before restarting. Use a riving knife or splitter if the saw has one for the specific setup and always clear the table of debris before resuming a cut.
How to choose the right bandsaw for resawing
Several features matter when selecting a saw for resawing. Look for sufficient throat depth and maximum cutting height to handle the boards you plan to split. Motor horsepower plays a role when cutting thick hardwoods. A heavier frame and larger wheels help maintain steady tracking under load. Blade guide systems that are easy to adjust help you keep the blade stable during long cuts.
If you are shopping and want a shortlist of what to look for start with wheel size and throat capacity then check maximum resaw height motor power and blade guide type. For hands on reviews and specific model suggestions see this list of the best bandsaw for resawing which compares features and real world performance.
Finishing steps after resawing
After a resaw cut the surface will often need some cleanup to be ready for glue up or finishing. For less visible areas a drum sander or belt sander can quickly bring pieces to final thickness and improve flatness. For faces intended for veneer jointing with a table saw or planer can remove knife marks and leave a surface ready to glue.
When making matching pairs for bookmatching label them face A face B and keep their order. Slight thickness variations can be addressed with sanding or a planer thicknesser but doing a consistent resaw technique reduces how much final work is needed.
Troubleshooting checklist before starting a resaw job
- Confirm blade type width and TPI match the material and cut length.
- Check wheel alignment and blade tracking.
- Set blade tension to the recommended range.
- Adjust upper guide bearings and thrust bearing close to the blade without pressing on it.
- Prepare a tall fence or resaw fence and set up featherboards or sled as needed.
- Test cut scrap material and inspect the face for burn marks drift and tearout.
- Adjust feed speed blade speed or blade selection based on test results.
Following that checklist reduces surprises and helps get consistent results. Small adjustments to pressure feed or guide spacing often change the outcome more than major alterations.
Resawing with bandsaws explained has covered the essential aspects from blade selection to final finishing. The technique rewards patience and attention to setup every time you work on a resaw project. Use the test cuts to dial in your settings and keep a log of what works for different woods and thicknesses so future projects start from a reliable baseline.
Conclusion
Resawing with a bandsaw is a practical skill that saves material and opens up options for furniture makers and hobbyists. By choosing the right blade keeping guides adjusted setting proper tension and using the right fences and jigs you will cut straighter and cleaner faces. Watch your feed rate and blade speed to avoid burns and use a sled or featherboards for safety and control. A good bandsaw setup reduces the need for extensive sanding or planing after the cut which saves time on the floor and produces better matching pieces for veneers or tabletops.
If you are ready to upgrade or buy your first dedicated resaw machine focus on throat capacity resaw height motor power and a dependable guide system. Start with test cuts and keep notes on each combination of blade and speed when you work with different species of wood. With practice and attention to the setup resawing will become a reliable part of your workflow and let you get more use from valuable lumber. Now pick a project find the right blade and give a resaw test on scrap stock before you commit to the main piece. Your next tabletop or bookmatched panel will show the results of careful setup and steady technique.